2018年12月13日 星期四

NetApp Modules for Ansible

最近在測試Ansible, 看到NetApp有支援 Ansible 的module, 就來測試一下

測試環境:
Ubuntu18.0.4
Ansible 2.7
ONTAP 9.2 Simulator

1.安裝Ansible
sudo apt update 
sudo apt install python-pip -y 
sudo apt-add-repository --yes --update ppa:ansible/ansible 
sudo apt install ansible

2.確認Ansible版本
ansible --version

3.安裝netapp python modules
sudo pip install netapp-lib

4.在NetApp storage上啟用 http-enabled
Cluster:> set -priv advanced
Cluster:> system services web modify -http-enabled true

5.接下來使用na_ontap_svm module測試透過Playbook建立新的SVM
https://docs.ansible.com/ansible/2.7/modules/na_ontap_svm_module.html#na-ontap-svm-module
sudo vim createsvm.yml
---
- name: Netapp-ansible-test
  hosts: localhost
  vars:
      login: &login
      hostname: 192.168.0.100
      username: admin
      password: passw0rd
  tasks:
      - name: Create SVM
        na_ontap_svm:
          state: present
          name: SVM_ansible01
          root_volume: vol1
          root_volume_aggregate: data_aggr01
          root_volume_security_style: mixed
          hostname: "{{ hostname }}"
          username: "{{ username }}"
          password: "{{ password }}"
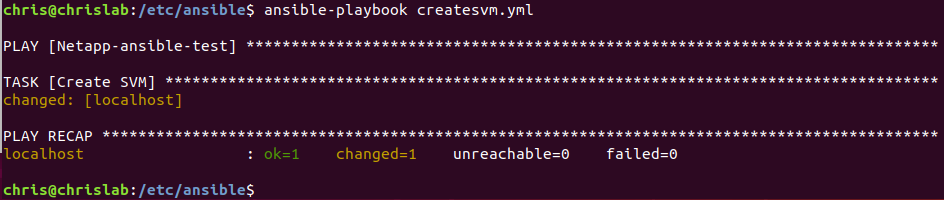

6.執行Playbook
ansible-playbook createsvm.yml

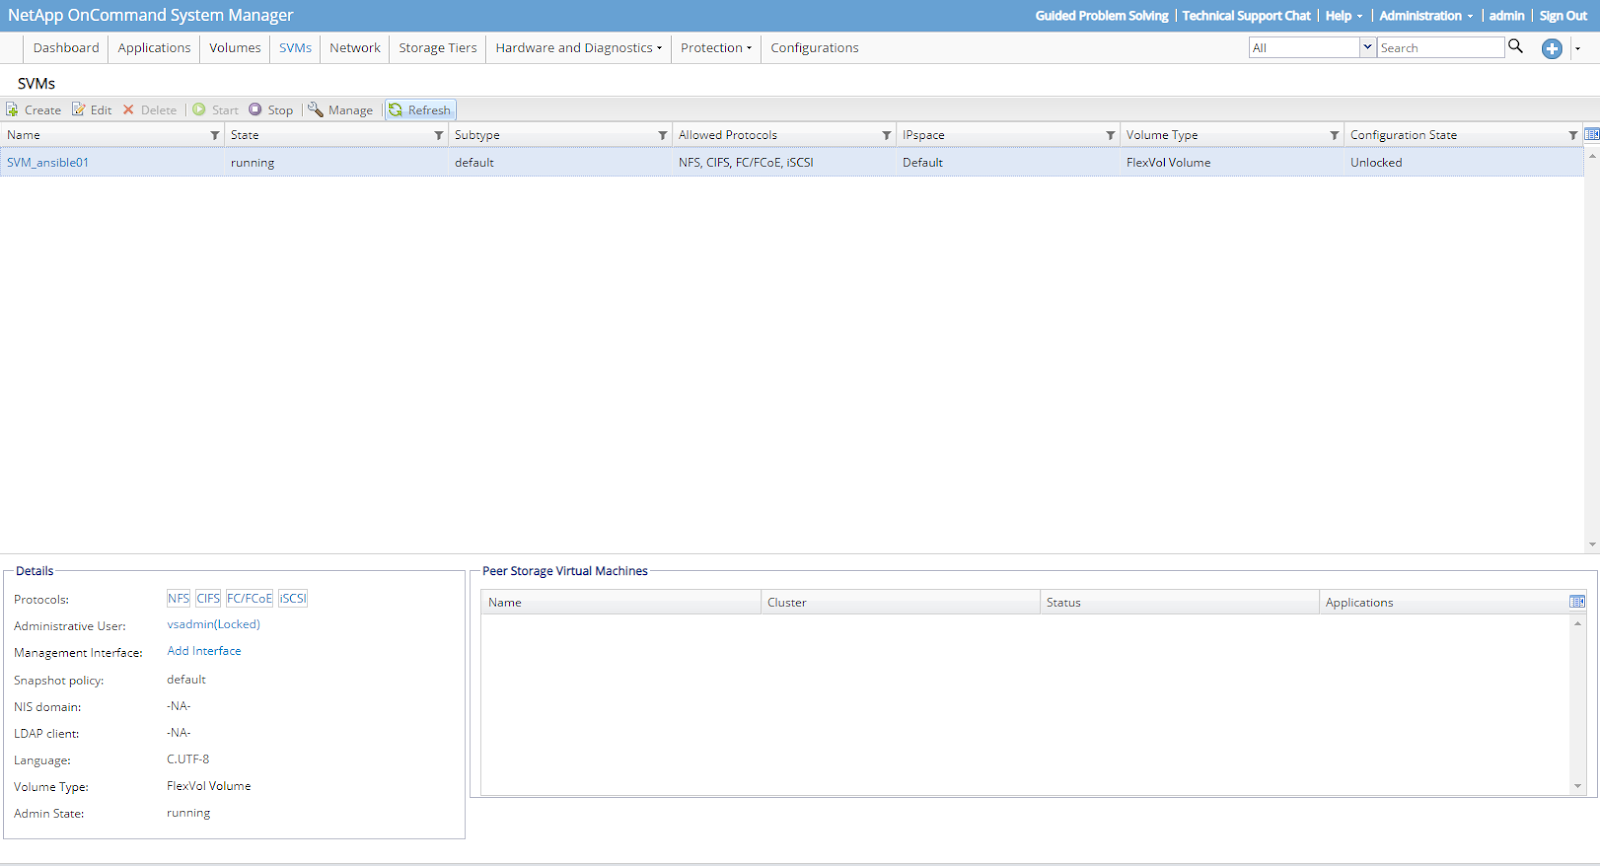
7.從NetApp System Manager可看到新的SVM已建立


參考資料:
https://docs.ansible.com/ansible/2.7/modules/na_ontap_svm_module.html#na-ontap-svm-module
https://netapp.io/2018/10/08/getting-started-with-netapp-and-ansible-install-ansible/

2018年11月27日 星期二

清除舊的硬碟上的 foreign aggregate

如果將其它cluster用過的硬碟換到另一個cluster時,會發現上面還有之前的Aggr記錄,可用以下方式清除

1.進入diag mode
NA-Cluster::> set diag

2.用disk show 確認舊的硬碟ID以及Aggr名稱,可以看到1.1.1 disk上還有之前的Aggr資訊
NA-Cluster::*> disk show
                     Usable Disk   Container Container
Disk                   Size Shelf Bay Type Type        Name Owner
---------------- ---------- ----- --- ------- ----------- --------- --------
1.0.21               3.63TB 0 21 FSAS    spare Pool0 NA-Cluster-N1
1.0.22               3.63TB 0 22 FSAS    spare Pool0 NA-Cluster-N1
1.0.23               3.63TB 0 23 FSAS    spare Pool0 NA-Cluster-N1
1.1.0                 3.63TB 1 0 FSAS   spare Pool0 NA-Cluster-N1
1.1.1                 3.63TB 1 1 FSAS   aggregate node1_root(1)
                                                                                             NA-Cluster-N1                                                                           

3.用storage aggregate remove-stale-record 清除舊的Aggr資訊
NA-Cluster::*> storage aggregate remove-stale-record -aggregate node1_root(1)
-nodename NA-Cluster-N1

4.用 storage aggregate show-spare 確認1.1.1已變成spare disk
NA-Cluster::*> storage aggregate show-spare                                                 
Original Owner: NA-Cluster-N1
Pool0
Spare Pool
                                                           Usable Physical
Disk                        Type RPM Checksum Size Size Status
--------------------------- ----- ------ -------------- -------- -------- --------
1.0.21                      FSAS 7200 block 3.63TB   3.64TB zeroed
1.0.22                      FSAS 7200 block 3.63TB   3.64TB zeroed
1.0.23                      FSAS 7200 block 3.63TB   3.64TB zeroed
1.1.0                        FSAS 7200 block 3.63TB   3.64TB not zeroed
1.1.1                        FSAS 7200 block 3.63TB   3.64TB not zeroed
                                  

2018年8月13日 星期一

Reassign ADP Data Partition Disk

1.需先進入advanced mode
storage aggregate show-spare-disks確認目前spare狀況
VMw-1.49~VMw1.60OwnerNode:cluster1-01
VMw-1.61~VMw1.72OwnerNode:cluster1-02

2.System manager建立新的Aggregates時也可看到兩個Node下各有12個硬碟

3.VMw-1.61data partitioncluster1-02移到cluster1-01

4.storage Aggregate show-spare-disks可看到VMw-1.61Owner已經移到cluster1-01

5. System manager建立新的Aggregates時可看到cluster1-01下變成13個硬碟,cluster1-02下變成
11個硬碟